

Crop Our Strip Templates In Darkroom Without Photoshop
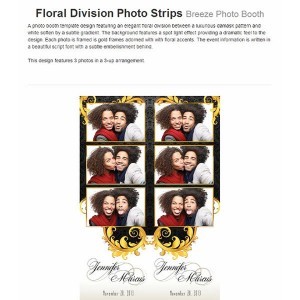
We get asked often why do your strips come as a 4×6 with two of them. Darkroom Booth only allows me to use one.
The short answer is that Darkroom Booth is the only software that deals with strips this way (like or not). Since we provide our templates to all the major photo booth applications we had to choose the common denominator and that is 4×6 format.
Good news is that you can use Darkroom Booth’s editor to still use our configuration files and standard included graphics and create a 2×6 strip. This keeps you from having to edit these is Photoshop or Photoshop Elements if you do not need color modifications and do not want to use the text effects our designers have used.
Cropping in Darkroom Booth
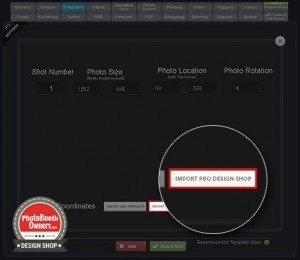
- You first need to install your template into Darkroom Booth. This video will walk you through that. https://www.youtube.com/watch?v=4BbRy6kL3E8
- Once installed go to Darkroom Booth Settings and click the templates choose button.
- Locate the template you just installed and double click on it to open it in the editor.
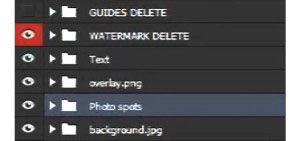
- Read and then delete the terms layer (bottom most on the right)
- Click the Edit Template button at the bottom left.
- Enter a width of 600 and a height 1800 and click ok.
- Select all the layers on the right (click then press ctrl + A).
- Using the move tool (arrow) click and drag all the layers up and to the right slightly. You’ll have to use your eye to get these centered as best you can.